![]()
Gravatars are everywhere. So if you don’t know what a gravatar is, or you aren’t using one, then this article is a must-read. Gravatars not only help others in your community recognise you, if you run a website or blog then a gravatar can help send traffic to your site. Gravatars are also quick and easy to set up, so there is no excuse for not creating one.
In this article, we will consider what exactly a gravatar is and why you should have one. We will then look at how to sign up and create a gravatar, including what type of image you should use and which crucial information your gravatar profile should contain. We will also cover the benefits of managing gravatars for those who own a WordPress website, and discuss how to change the default gravatar to help your site stand out from the crowd.
What is a Gravatar?
If you have ever read or commented in a discussion under a blog post, or in a community forum on a website, you may well have noticed pictures next to other users names. These images, which can be photographs or graphics, are avatars. WordPress uses a particular type of avatar, called a gravatar, which stands for Globally Recognized Gravatar.
Originally, to display an avatar, users would have to register with a site and add their image to their profile. However, people started to become less interested in continuously registering with sites, whilst at the same time the importance avatars was realised. This led to the creation of the ‘Gravatar’ service.
‘Gravatar’ a free service owned by Automattic. It allows you to create your own gravatar, which is linked to your website address. Once you have set up a gravatar account and uploaded your picture, the image, and profile information, an avatar will display everytime you leave a comment or join a discussion.
Why Should You Have a Gravatar?
![]() There are a number of reasons for you to create your own gravatar. Firstly, it is a great way to become part of an online community and network with those in your industry. On the whole, the majority of people react, recall, and importantly connect with images much more easily than text. Displaying an image of yourself, or even a graphic that people associate with you, will give you an identity to your peers and help you to become recognized.
There are a number of reasons for you to create your own gravatar. Firstly, it is a great way to become part of an online community and network with those in your industry. On the whole, the majority of people react, recall, and importantly connect with images much more easily than text. Displaying an image of yourself, or even a graphic that people associate with you, will give you an identity to your peers and help you to become recognized.
If you are someone who likes to comment frequently on blogs, then other readers will quickly get to know your gravatar, and you will become a well-known part of the blogging community. The more you are recognised, the more likely people are to read and respond to your comments, as they will come to see you as an expert in your field.
And this takes us on to the second key reason for having a gravatar. If you run a website or a blog, then using a gravatar is a useful way to build your brand. By being repeatedly seen on other blogs, your target audience will eventually check out your site. They may also contact you to get an opinion on a specific matter, or use your services, as you be seen as a familiar, reliable, and trustworthy source of knowledge within your niche. Once traffic has arrived at your site, people are more likely to return, part with an email, buy a product, or convert against any other goals your site may have.
So now we know what a gravatar is and understand the importance of using one. Let’s next find out how to set a gravatar up…
How to Set up Your Own Gravatar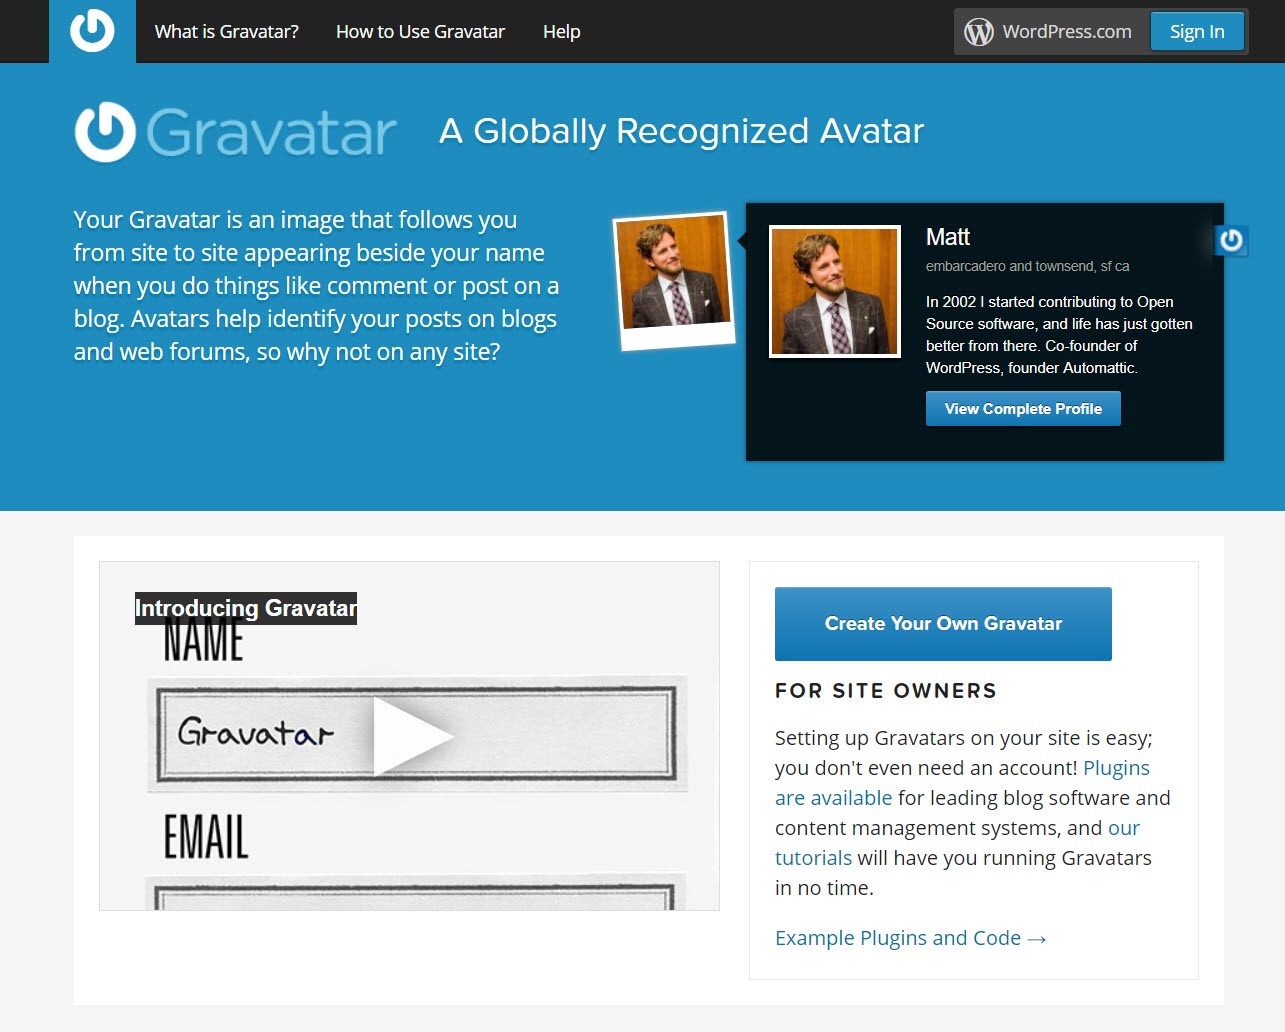
To set up a gravatar you need to open the ’Gravatar’ website and click on ‘Create Your Own Gravatar’. You will then need to signup with WordPress.com.
My Gravatars
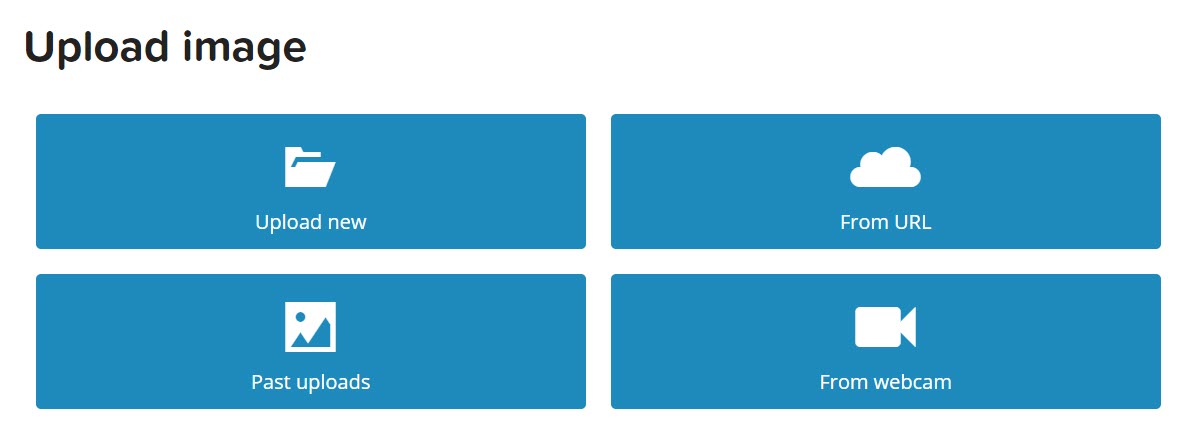
Once you have created and activated your account, you can log into ‘Gravatar’ and set your gravatar up. Under the ‘My Gravatars’ tab, click on ‘Add New Image’. Then upload an appropriate image that you would like to use for your gravatar.
Think carefully about the image you use, and make sure it not just represents you but is also suitable for your niche. If your goal for your gravatar is to drive traffic to your website, consider using your site’s logo or favicon as your image.
My Profile
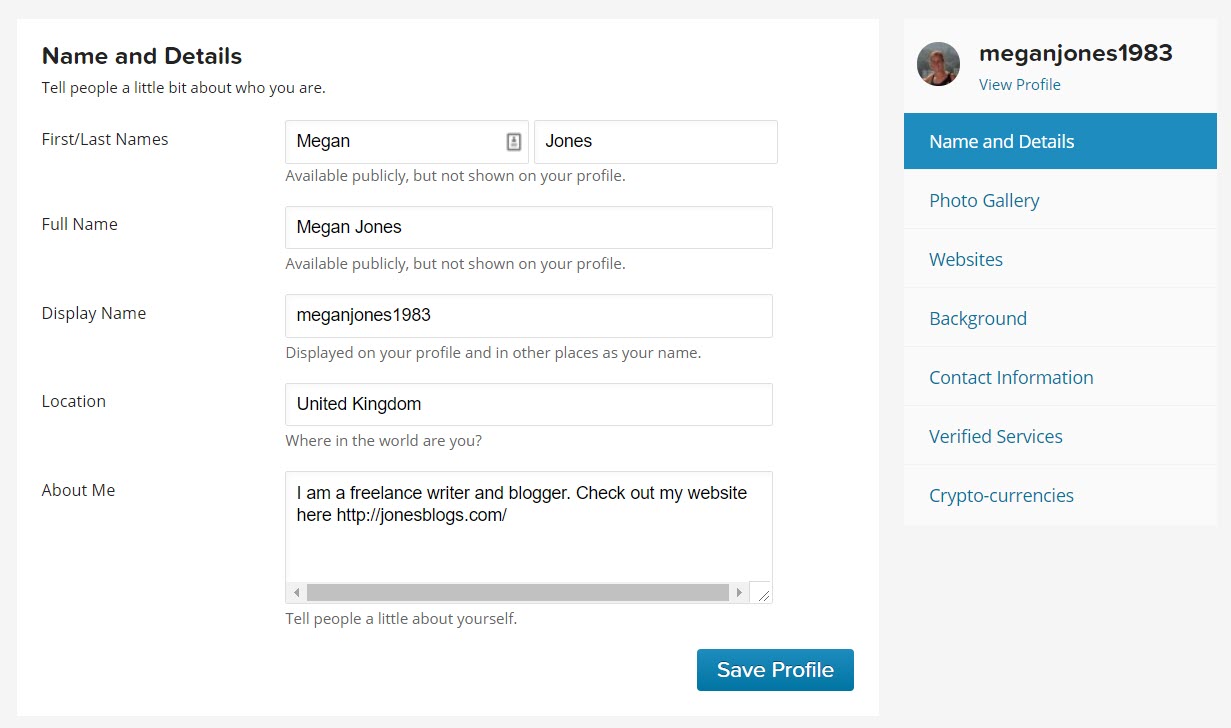
Select the ‘My Profile’ tab from the top menu bar. Here you should add your information, including the name you want displayed publicly, your contact information and web address. Again, think carefully before writing your ‘About Me’ text, and if you want to send traffic to your website include your website’s URL here too.
You can also add your social media channels so those who check out your gravatar can follow you. To do so, click on ‘Verify Services’, to verify which social profiles are yours. Other extras you can add include further photos and cryptocurrency addresses.
Once you have finished, click on ‘Save Profile’. Then ‘View Profile’ to check out how your gravatar will appear to others. Now everytime you comment on a community forum or post in a discussion, your gravatar will appear.
Gravatars On Your WordPress Website
If you run a WordPress website, there are a number of benefits to having gravatars displayed on your site. Avatars help create a community around your site, helping your audience recognize and interact with each other. This will encourage your visitors to regularly return to your site to converse with their collective.
Gravatars also help website owners, enabling you to quickly identify your key audience. Look at what your regular avatars are interested in, what they comment on and the shape their discussions take. You can then tailor your content creation appropriately, and cater directly to your target audience’s needs.
Managing Gravatars on Your Website
WordPress websites have built-in support for gravatars, so visitor’s avatars are automatically shown when visitors leave comments on a site. However, if you want to manage how gravatars appear on your WordPress website, this can be done from within your WordPress dashboard. Let’s find out how…
Enabling and Disabling Avatars
Click on ‘Settings > Discussion from your WordPress menu, then scroll down to ‘Avatars’.
![]()
Here you can enable or disable avatars on your site (by default avatars will be enabled). You can also choose what rating of gravatar you want on your website, ensuring that no inappropriate avatars are displayed.
Turning on Gravatar Hovercards
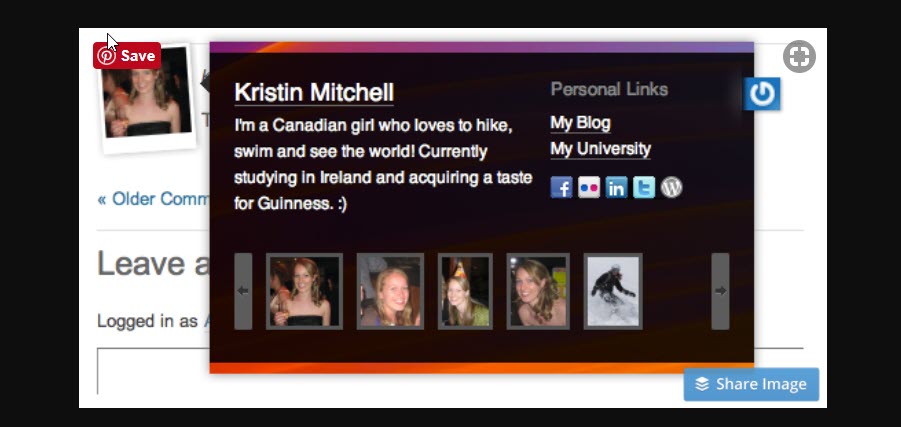
Another option under ‘Avatars’ is to enable gravatar hovercards. These hovercards show gravatar profile information when people hover their mouse over any avatar. By turning on gravatar hovercards your community will be able to learn more about each other and easily connect.
Changing the Default Gravatar
Anyone who comments on your site, who hasn’t already set up their own custom gravatar, will be given the default ‘Mystery Person’ avatar (a white and grey outline of head and shoulders). If you want, you can give your site its own default avatar. This will help add a little fun to your site’s comment sections, can provide users who are ‘without’ with their own gravatars, and help give your website an edge over its competition.
![]()
To change the default gravatar, scroll down to ‘Default Avatar’ in the ‘Avatar’ section. Here you can choose from a blank or generic logo, or a generated one. The generated logos will be automatically created based on a users name and email address. These will provide each individual with their own custom avatar, which will remain the same every time they make a comment. Once you have selected an avatar type, scroll down to the bottom of the page and click ‘Save Changes’.
Final Thoughts on Gravatars
The benefits of using gravatars are plentiful. And, as you can see, gravatars are very quick and easy to set up and manage (both for individual purposes and on your WordPress website). So if you haven’t yet created your own gravatar, or customised your gravatar settings on your website to suit your audience, now is the time to do so.
Do you have any questions about creating a gravatar? If so feel free to ask them in the comments below…
Hi Megan,
Nice tutorial on Gravatar. I display avatars on my WordPress sites and like the idea of using them to identify your key audience.
I also like to have my avatar when commenting on other sites.
Thanks, Megan Jones
Very informative article on Gravatars. There is many WordPress bloggers community they don’t have any more idea the power of Gravatars. But Through your article, they will get a right amount of information and the basic idea also. Most Bloggers especially newbies get confused when they set up their WordPress blog and they discover that they can’t find the part to upload their profile picture on their WordPress profile settings page. I was once like this, in fact I thought those who had a Gravatar performed some sort of magic!
Regards,
Roshan